Haugbui Jarl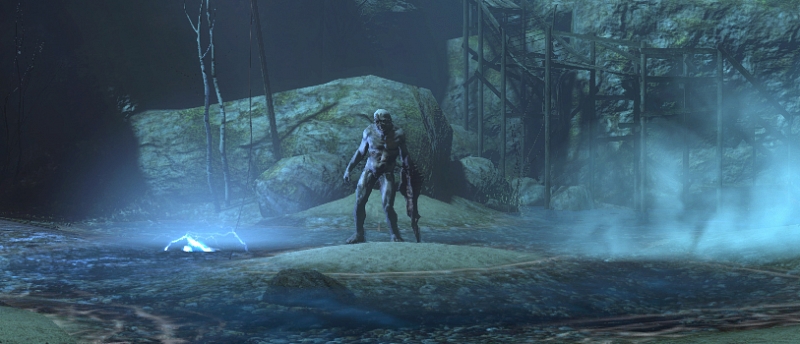 |
||
|---|---|---|
|
Attack type |
Minion spawns |
Enrage timer |
|
This is a pretty straight forward fight. The boss has two abilities he will use in addition to his standard nameless attack. Charged Hack - A powerful single target attack which deals more damage than his standard attack, the tank should interrupt this attack when possible by using an ability that stuns or hinders the target, at least in the harder Elite versions of this dungeon. Deep Calling - This attack will make black pools appear beneath every group member’s feet. It is imperative to dodge these pools within the next few seconds, or you will take damage. This attack can be prevented from being cast by having the tank break line-of-sight to the boss before it has been cast. During the fight it is advised to not step in the water unless forced to as the water is electrified and will therefore deal damage to anyone who steps in it. The tank should tank the boss on the same island he stands on before the fight begins. |
||
Elite 5 - 10 MechanicsIn the difficulties Elite 5, 6, 7, 8, 9 and 10, it is very important to interrupt the Charged Hack ability as it will deal significantly more damage in those difficulties. Furthermore, it is critical to avoid the Deep Calling attack. It can one-shot the DPS. |
||
Blarbane Sorceress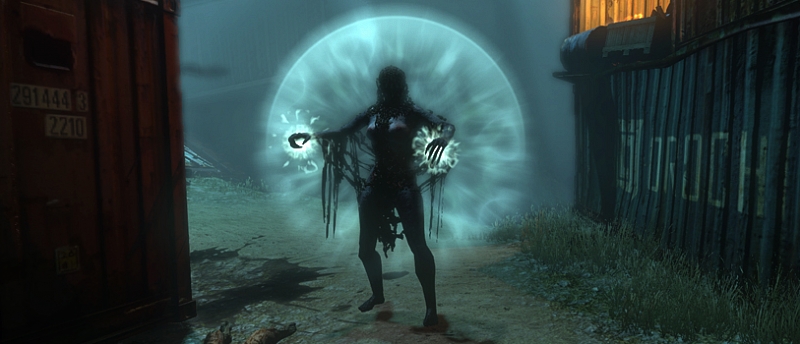 |
||
|---|---|---|
|
Attack type |
Minion spawns |
Enrage timer |
|
Before charging at the boss, the DPS should take down all the pods in the boss area, it is possible to do this without making the boss attack you. Once this is done, the tank should move in and grab the boss, it is recommended to tank her near the exit of the arena, while at the same time making sure that any rDPS (Ranged DPS) can get a clear shot at her from afar. She has three special attacks: lll Runes - A single target close range attack, this is her standard attack and should not cause any trouble Deathsquall - When cast, she will summon a storm cloud, this will deal damage for as long as it is active, it is advised to impair this when possible to avoid taking unnecessary damage. Tide Wall - Summons a barrier which will protect her from a certain amount of damage. If the tank has enough impairs, this can be impaired, if not it should not take the DPS long to burn through it. It is also possible to purge the shield after it has been applied. Several times during the fight, two sea burial adds will enter through the exit side barrier of the boss arena. The tank should grab these as soon as they enter and hold their aggro. |
||
Elite 5 - 10 MechanicsIn the difficulties Elite 5, 6, 7, 8, 9 and 10, everyone except the tank should be very careful about standing too close to the boss while the storm cloud is present. Furthermore, it's extra important that the tank grabs the Sea Burial adds that are spawned. |
||
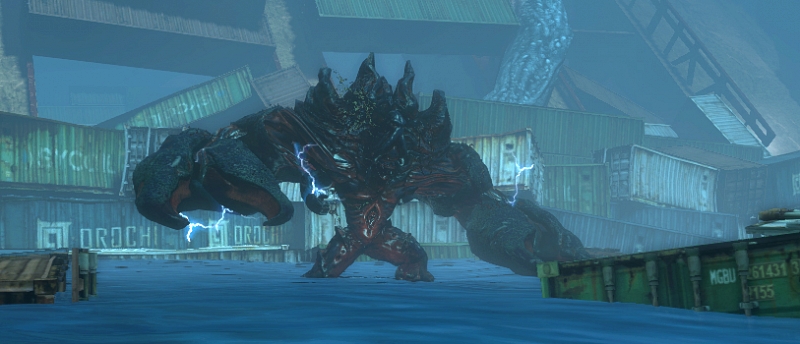
The Varangian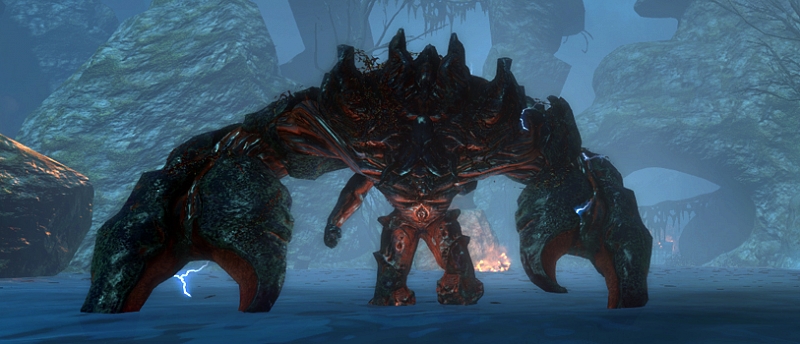 |
||
|---|---|---|
|
Attack type |
Minion spawns |
Enrage timer |
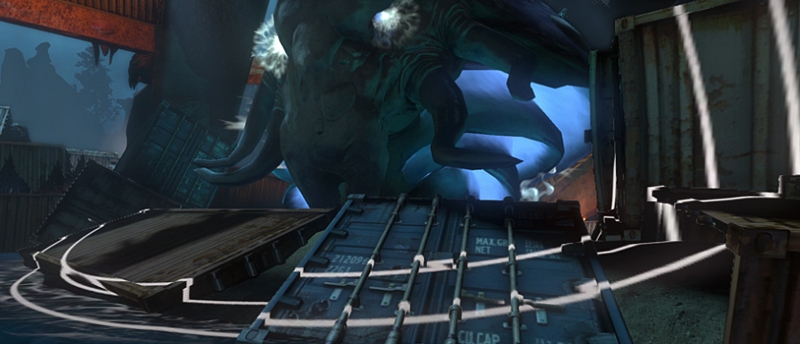
Phase 1This fight has two phases. During the course of this first phase he will use two abilities in addition to his standard, nameless attack. Charged Hack - As with the first boss, this attack deals more damage than his standard attack and should be interrupted. Deep Blast - This will summon a black pool in the area around him, this should not be impaired as the tank, and any nearby DPS can easily dodge away from the boss before the attack triggers and deals damage. If you ar ehit by the attack, however, you will take a large amount of damage and be thrown back. From time to time The Varangian will submerge himself in the water and sea burial adds will take his place. Kill these adds as fast as possible and look for where the boss will re-emerge from the water, this can be seen as the area where he is “hiding” will show white beams/particles as shown in the picture below. When he reaches 50% HP he will become immune to all damage and move to the second arena, follow him and kill any adds you see along the way. Phase 2The boss will stand In the centre of some containers, jump onto one of them and keep out of the water as it will become electric as soon as the tank pulls the boss. From time to time one of the containers will turn electric and deal damage to anyone standing on it, you should then jump to another container in order to avoid taking constant damage. The tank should keep impairing Charged Hack whenever possible, while the DPS focus on taking down the boss. He will not summon any adds during this phase.
|
||
Elite 5 - 10 MechanicsIn the difficulties Elite 5, 6, 7, 8, 9 and 10, it is very important to interrupt the Charged Hack ability as it will deal significantly more damage in those difficulties. Furthermore, it is critical to avoid the Deep Blast attack. It can one-shot the DPS. |
||
Haugbui Mother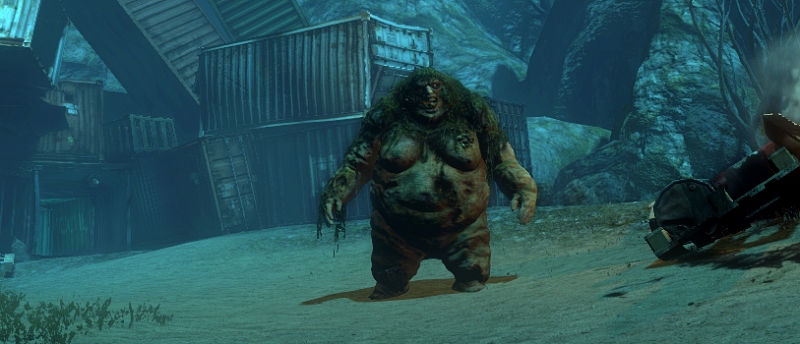 |
||
|---|---|---|
|
Attack type |
Minion spawns |
Enrage timer |
Phase 1This fight has two phases. The tank should grab the boss and pull her towards the exit side of the arena, as Volatile Hosts adds will enter from this side during the fight. These adds function as walking bombs and will explode after entering the arena, the DPS should therefore kill them as soon as they enter. The boss herself will use three different attacks. Firstly there is her regular, nameless attack which should not be a problem at all. Corpulent Slam - This is an AoE (Area of Effect), and should be dodged by anyone in the targeted area. It takes quite some time to activate, so dodging it should not be a problem. Eversion - This ability will initiate Phase 2. She will stop attacking and freeze to the spot while this ability activates. It is not possible to interrupt this ability in any way. Everyone inside the area it affects should dodge out of the way before it activates as it will make her explode and deal heavy damage to anyone inside. Phase 2As the Haugbui mother explodes, three Sea Horrors will appear where she used to stand. These only have one attack named Corrosive Expectoration, this is a ranged magic attack. The tank has to hold the aggro to the best of his/her ability while the DPS take down the three sea horrors. In order to make this as efficient as possible, the DPS should try to coordinate their attacks so that they focus on the same sea horror.
|
||
Elite 5 - 10 MechanicsIn the difficulties Elite 5, 6, 7, 8, 9 and 10, it is very important to kill the Volatile Hosts. They will place a movement hindering effect on their target and they can one-shot the DPS when they explode. The damage can even overwhelm the tank. |
||

Primordial Dweller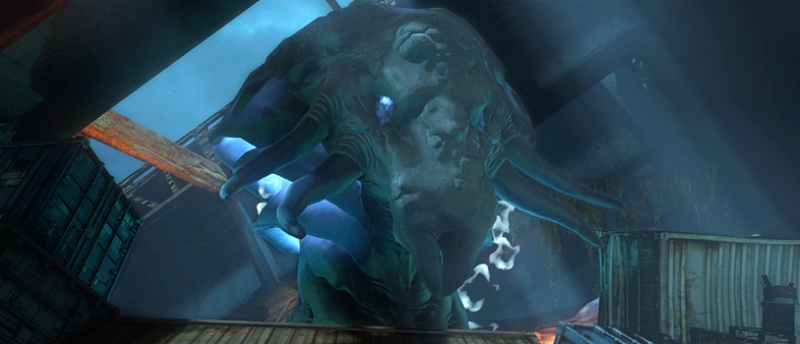 |
||
|---|---|---|
|
Attack type |
Minion spawns |
Enrage timer |
|
The tank should be standing on the blue container on the right side in front of the boss while tanking it. During the fight Volatile Host adds will appear, these should either be killed by the DPS, or dodged. The Volatile Host adds will only deal damage if you are hindered as they explode, activating any cleansing ability will therefore make you immune to the damage they deal upon exploding. The Volatile Host adds will only appear while the boss has over 50% Health left. Groups of adds called “Primordial Spawn” will also enter the fight from time to time, these have a tendency to go after the healer so it is important for the DPS to get them off the healer as soon as possible. Black areas of water will appear during the entire fight, these must be avoided as they will explode and deal damage to any group member standing on it after a few seconds.
The boss itself has four different attacks: Seizure - This is his standard attack and should not cause any problems. Synapse Spasm - This is a chain attack, so the rest of the group should not stand close to the tank at any time as the chain might hit them too should they be too close. Tide Wall - A barrier that will absorb a certain amount of damage. It can be impaired by the tank, but the boss may re-cast it again immediately. Alternatively, it can be purged or broken by the DPS after it has been cast. Puring the effect is more efficient than breaking it with damage, as a considerable amount of damage may be wasted. Psychic Death Zone - This is an AoE attack that cannot be interrupted. Get away from the boss. After this ability has been successfully cast, the boss will surround itself in black storm clouds and summon adds to the fight. Any primordial spawn should be killed before they give the healer too much trouble, and bombs should either be avoided or killed. Finally, the tank can choose to either keep tanking the boss on the container (if the healer can heal through the constant damage the storm inflicts on the tank) or grab some of the adds, in either case it is important that the tank does not get too close to the DPS or the healer because of the synapse spasm attack.
|
||
Elite 5 - 10 MechanicsIn the difficulties Elite 5, 6, 7, 8, 9 and 10, the Dweller's main attack will be a chain attack that can jump to other team members if they stand too close to the tank. Therefore, the tank should stand on the blue container on the right side, while the DPS and healer should stay on the left side. Furthermore, it is important to kill the Volatile Hosts. They will place a movement hindering effect on their target and they can one-shot the DPS when they explode. The damage can even overwhelm the tank. |
||

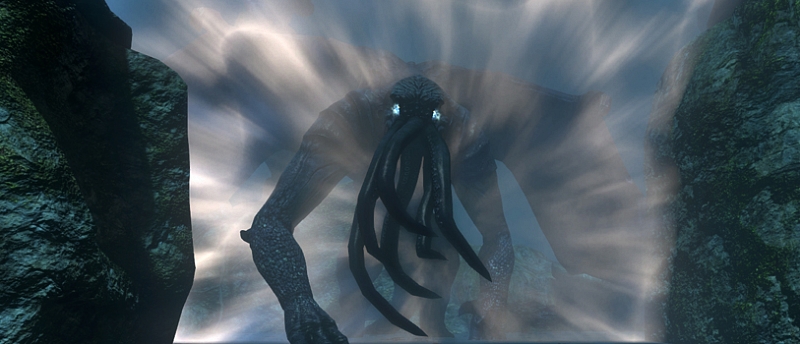
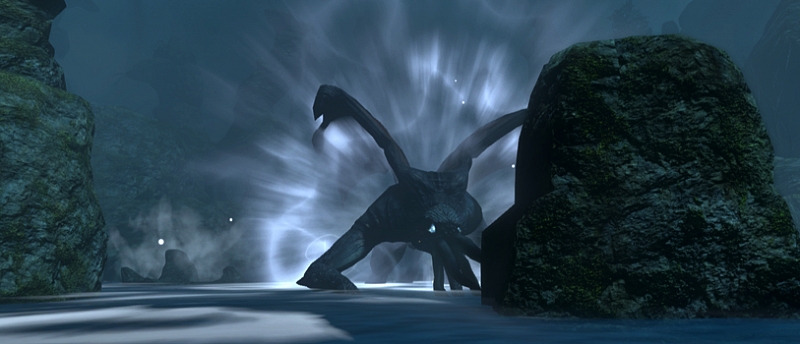
The Ur-Draug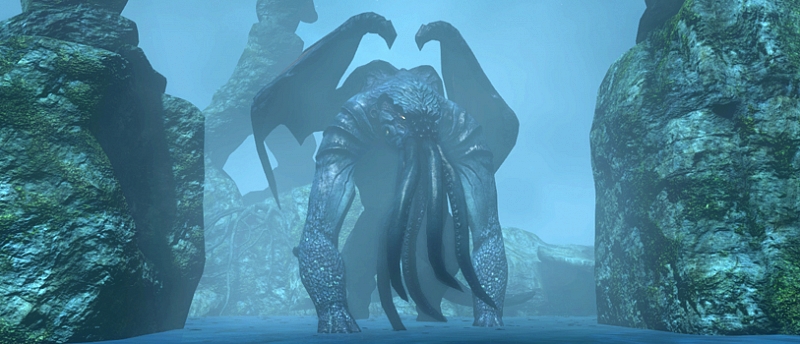 |
||
|---|---|---|
|
Attack type |
Minion spawns |
Enrage timer |
|
This fight has four notable phases. Phase AThe tank should stand so that the boss faces the cliff behind its original location. The Ur-Draug will constantly use two abilities in this phase, the DPS and the Healer should stand so that they cannot be hit by either attack, it is therefore advised for anyone not tanking to stand behind the Ur-Draug, between the two rocks, at all times. Cleave - A basic, heavy hitting cone attack. This is his standard attack in this phase. In the Elite 5+ difficulties, the Cleave attack can hit multiple targets, so keep your distance from the tank. Slam - A cone shaped attack which should be avoided by the tank walking to either side of the targeted area, this will give the healer some time to catch up on the healing as opposed to impairing the attack. Cosmic Gaze - The Ur-Draug will deal damage every second or so to anyone caught in its mist-like breath.
Phase BThe Ur-Draug will start casting “Rendering the Veil” which will make the arena turn blue. While this effect is active, no members of the group must be seen by the Ur-Draug, in other words, do not engage! Hide with your group behind one of the huge rocks and circle it to avoid the Ur-Draug’s line of sight, tank and spank any adds that spot you during this phase.
Phase CThis is exactly like Phase A, but with one exception. The Ur-Draug will submerge itself in water and re-emerge in the centre of the arena, all members of the group must then hide behind either of the rocks for the duration of the attack. Once the attack has finished, the tank and the rest of the group should dodge opposite ways so that the Ur-Draug cannot cleave the DPS or the healer when it re-emerges.
Phase B and C will repeat until the Ur-Draug is close to being defeated. However, the Ur-Draug will pulverise at least one rock during each Phase B, which means eventually there will be no rocks to hide behind. At that point you will face certain death. Phase DThe Ur-Draug will strengthen itself, and much like Phase B, the screen will turn blue. Only this time, all the rocks will explode (do not stand close to them when this happens as they will deal heavy damage to those who stand too close), do not bother with hiding, but instead, bring the Ur-Draug down as fast as possible. The Ur-Draug will pull all members of the group close to itself, it is important for everyone who is not the tank to move away from the front of the Ur-Draug as his cleave attack will deal heavy damage to anyone in its path. Warning! If your group is significantly overgeared, Phase B and Phase C may switch places, the Ur-Draug will then start casting the ability “Rendering the veil” which initiates Phase B right after the Phase C massive AoE attack has finished. |
||
Elite 5 - 10 MechanicsIn the difficulties Elite 5, 6, 7, 8, 9 and 10, the Ur-Draug's main attack will be a cone-shaped "Cleave" attack. This means that the attack will hit anyone standing in front of it, and not just its main target. Additionally, in Phase C when the Ur-Draug submerges into the water and re-appears in the centre; after the Ur-Draug has cast its blast attack where you have to hide behind the rocks, it will submerge into the water again. You will see a bubble effect appear in the water where you (the players) are standing. The Ur-Draug will rise from the water at that location. It is important that you escape that area, otherwise you will take a lot of damage (perhaps even die). In these difficulty modes, the Cosmic Gaze attack will constantly send you flying backwards. It may be wise to tank the Ur-Draug near one of the large boulders or the edge of the arena. Finally, in Elite 5 - 10 it is critical that noone is standing close to any of the boulders when the fight advances to the last phase. The boulders will deal a fatal amount of damage when they explode. |
||