Fog and Mirrors
Posted by on January 1, 2019.
Last updated by on December 17, 2024.
Contributions made by .
Mission Description
One of the monsters that began appearing around the winter holidays dropped a phone on its demise. The purple flag on the back of the phone raises more questions than it answers.
The [Slightly Damaged Mobile Phone] drops randomly from Winter Holiday Champions and goes into the Mission Inventory. The phone will drop regardless of whether or not you have one of the Bounties for the Winter Holiday Champions, and may drop within one Winter Holiday Champion or may take all Champions or even not drop after all nine have been killed.
Winter Holiday Champion loot resets every 18 hours per Winter Holiday Champion.
Fog and Mirrors rewards two (2) [Gift-Wrapped Presents] upon completion.
Use the [Slightly Damaged Mobile Phone] to start Fog and Mirrors.
Winter Holidays
This mission is only available during the Winter Holidays event.
Tier 1
Task Description
Your GHOST can interface with the damaged mobile phone. There may be a lead hidden within.
Objective: Investigate the phone
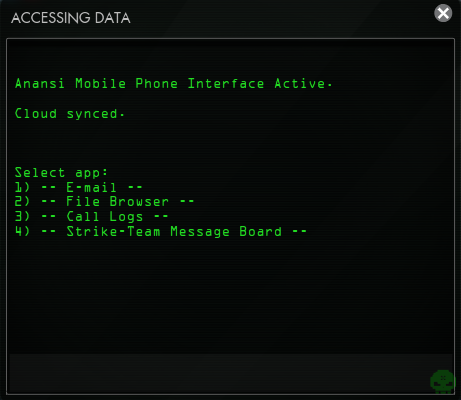
Take a look into the contents of the mobile phone. It will persist in your Mission Inventory throughout the duration of Fog and Mirrors.
There are many things within the phone to look at. Some appear more important than others at first glance.
Select 2) -- File Browser -- and then open 1) -- Meeting Location.txt -- to view the contents of a peculiar text file:
C1.
Mcny ufjbu: 1472 Jyulf Mn. Nbun'm lcabn, ch Hyq Sile. Gyyn nbyly uznyl yrnluwncih. Nby zlihn xiil cm fiweyx. Jummwixy cm fun uhx fih iz nby zilvcxxyh wcns. Sio ehiq nby ihy. Ch Cnufs.
Objective: Find the meeting location
Now that you know that a meeting location exists, you just need to find it.
Consider what the Meeting Location.txt says.
The Meeting Location.txt is encrypted in a cipher.
The Meeting Location.txt has the header of 'C1'. Search the phone for information about 'C1'.
Thorough investigation of the phone's contents leads to a variety of emails describing ciphers, C1, and a procedure the phone's owner should have followed.
The phone's original owner was supposed to trash Key 1 for the C1 cipher and received multiple warnings to do so.
The key can be found in 1) -- E-mail -- > 3) -- Saved -- > 1) -- FW: KEYS - DELETE AFTER READING --
Subject: FW: KEYS - DELETE AFTER READING
From: op-seafoam-ground4b@fleet8.wotermail.co.ukHere is key 1. Memorize it, then delete this, and purge your phone and e-mail accounts.
ABCDEFGHIJKLMNOPQRSTUVWXYZ
UVWXYZABCDEFGHIJKLMNOPQRST
Using the Key 1 found within the phone, decrypt Meeting Location.txt.
Key 1 is as follows:
ABCDEFGHIJKLMNOPQRSTUVWXYZ
UVWXYZABCDEFGHIJKLMNOPQRST
To decrypt using the given key, take a letter in the encrypted message and map it to the alphabet key, with encrypted letters going on the bottom row. Simply find which letter in the normal alphabet they correspond to in order to find the original letter. For example, U in a C1-encrypted message would be A when decrypted.
The encrypted message is:
C1.
Mcny ufjbu: 1472 Jyulf Mn. Nbun'm lcabn, ch Hyq Sile. Gyyn nbyly uznyl yrnluwncih. Nby zlihn xiil cm fiweyx. Jummwixy cm fun uhx fih iz nby zilvcxxyh wcns. Sio ehiq nby ihy. Ch Cnufs.
Decrypted, it reads as:
C1.
Site alpha: 1472 Pearl St. That's right, in New York. Meet there after extracting. The front door is locked. Password is lat and lon of the forbidden city. You know the one. In Italy.
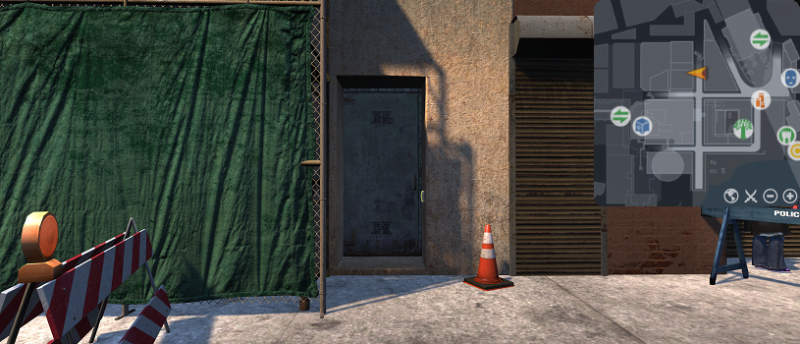
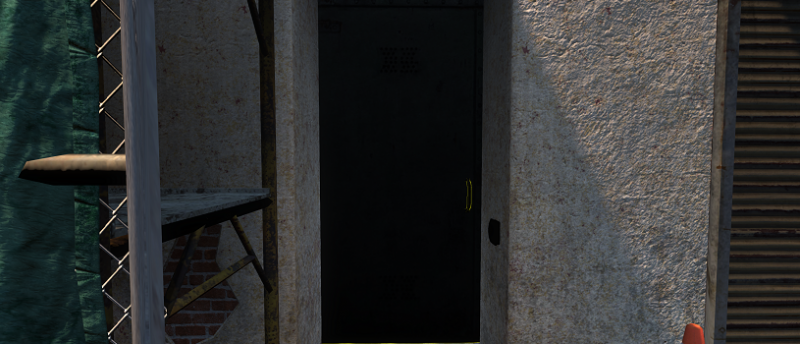
The location is 1472 Pearl St. in New York, where a reinforced steel door awaits (292,416). Use its Access Keypad.
Objective: Unlock the door
There is a keypad, and it calls for a key. Use the appropriate key code to unlock the door.
Consider the decrypted words of Meeting Location.txt.
The password is the latitude and longitude of the forbidden city in Italy.
This means something specific to the original owner of the phone.
Sometimes the Mission Journal can be quite handy in giving background information.
As per the Mission Journal, the phone has the purple flag of the Phoenicians on its back.
The Phoenicians are currently forbidden from Venice after their fall-out with the Council of Venice and loss of their seat some years ago.
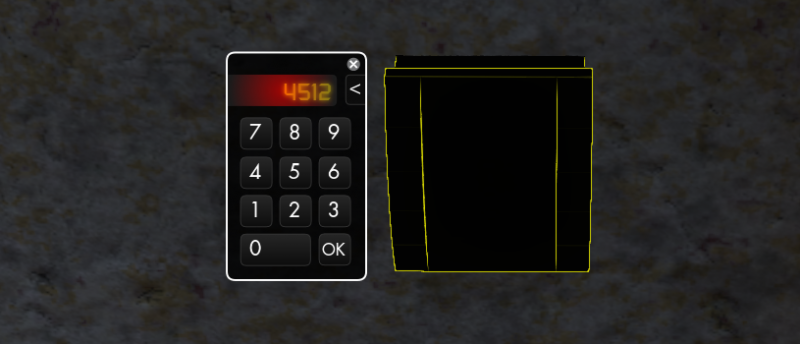
The latitude and longitude of Venice is 45.4408° N, 12.3155° E; however, the keypad only accepts 4 digits.
The password is therefore 4512.
Objective: Enter the building
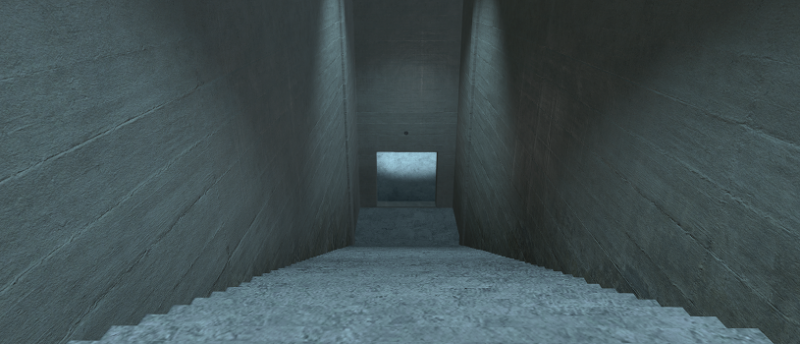
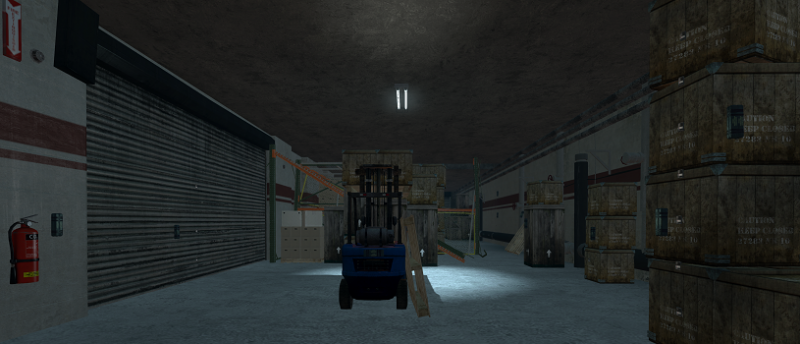
With the door unlocked, it is time to enter. Upon opening the door to enter, a difficulty selection prompt will appear. Select the difficulty desired and enemies within shall be scaled accordingly. Doing so will take you to the Warehouse Basement.
For those under level 50, the only difficulty available is Story Mode. For those at level 50, there are Elite difficulties available depending on the highest Item Power value achieved by your character.
Tier 1
Task Description
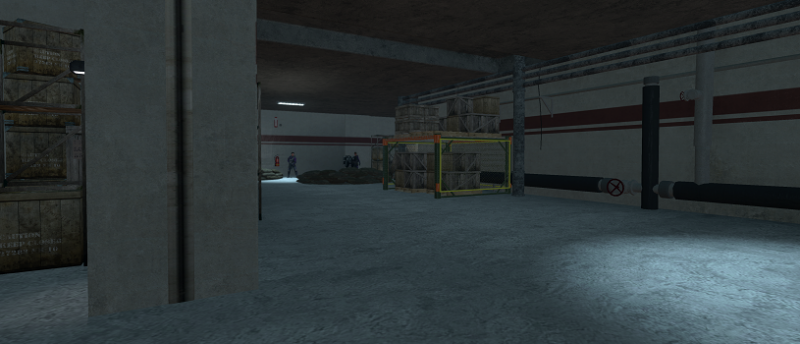
A non-descript door on an alleyway in New York lead to a warehouse basement. The warehouse may not be as abandoned as it seems.
Objective: Explore the warehouse
Once inside, press onward and go down the stairs and into the warehouse proper.
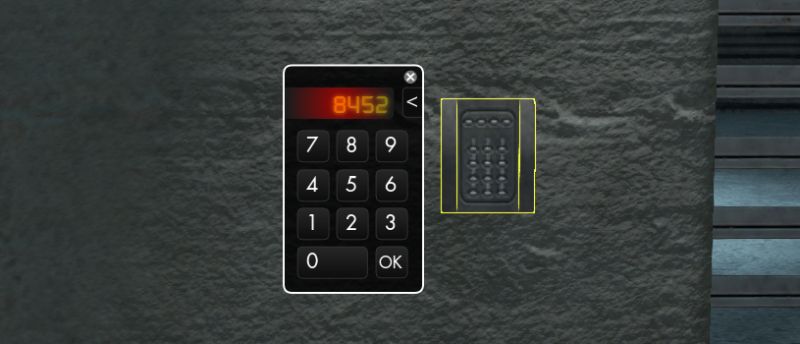
A gate blocks the way farther inside. Use the keypad beside it.

Objective: Open the gate
Input the correct key code in order to open the gate.
In the very beginning of the basement is a desk with a computer just waiting to be hacked by you.
Use of the computer requires a password.
The password may have a hint.
Inputting the hint command reveals:
Password hint:
0123456789
2345678901
The format should be familiar. This is another cipher key, this time for numbers instead of letters.
If you are uncertain how to apply the key, the Slightly Damaged Mobile Phone has an incredible amount of information that you may have stumbled upon during earlier investigation into it.
A message meant for when you arrive in the Basement Warehouse can be found in the Slightly Damaged Mobile Phone in the e-mail app at 1) -- E-mail -- > 1) -- Inbox -- > 4) -- For when you get here --.
The e-mail reads as follows:
Subject: For when you get here
From: op-seafoam-tech1@fleet8.purpleflags.swC2. Cql Thbuon, mcq WU whnnfsbi hm mcq tqqmkax wskam kn Kbsawow33596. Mcq bqnm sz mcq ukwcqb jql kn ka mcq whnnfsbi ckam.
Unlike before, this message is labeled with the 'C2' header. Another cipher is in use.
Search the phone for information on C2 in order to decrypt the message.
In the very same place in the phone as the Meeting Location.txt is another text file. Go to 2) -- File Browser -- > 2) -- C2.txt -- for C2.
ABCDEFGHIJKLMNOPQRSTUVWXYZ
HYUIQZXCKEJRTASWVBNMOPFGLD
Using the C2 key found within C2.txt, translate the message within For when you get here, as you are indeed here.
The C2 key as given in C2.txt is as follows:
ABCDEFGHIJKLMNOPQRSTUVWXYZ
HYUIQZXCKEJRTASWVBNMOPFGLD
To decrypt C2, much the same steps as with C1 must be followed. Instead of using the key given for C1, use the C2 key instead. For example, to decrypt an encrypted message, any H would decrypt into A as the true value of that letter in the message.
The encrypted message is:
C2. Cql Thbuon, mcq WU whnnfsbi hm mcq tqqmkax wskam kn Kbsawow33596. Mcq bqnm sz mcq ukwcqb jql kn ka mcq whnnfsbi ckam.
Decrypted, the message reads as:
C2. Hey Marcus, the PC password at the meeting point is Ironpup3356. The rest of the cipher key is in the password hint.
And just as they said, that is not the final decryption for when you are at the meeting point. Another key was given through the PC password hint:
0123456789
2345678901
Add that to the original C2 key to get the full key for the C2 cipher:
ABCDEFGHIJKLMNOPQRSTUVWXYZ0123456789
HYUIQZXCKEJRTASWVBNMOPFGLD2345678901
Using the full key available to you, Ironpup335596 becomes Ironpup11374.
Ironpup11374 is the password to the PC.
Now you can access the computer.
You now have a password and have a PC in need of a password.
Search through the PC's contents after applying the appropriate password.
Only some of the information is relevant to your location within the warehouse.
Enter Ironpup11374 as the password to have free range of the PC's contents.
Select 1) -- Bay 1 --, as this is the first bay within the warehouse basement, and then go to 3) -- Maintenance Tickets -- to try and learn more about the keypad. There are only two tickets. Ticket 2) -- #001-024 -- has content concerning the keypad.
The order is therefore: 1) -- Bay 1 -- > 3) -- Maintenance Tickets -- > 2) -- #001-024.
Maintenance Ticket #001-024 contains the following:
Maintenance ticket #001-024
Status: Reopened
Assignee: T. Harolds
Description: Security gate keypad brokenResolution: It's fine. The code was changed to 8452
Reporter Reopen: I forgot the code. What is it again?
The keypad has a new code, one left in a reopened ticket for those forgetful workers who may need it.
Input 8452 in the keypad to open the gate.
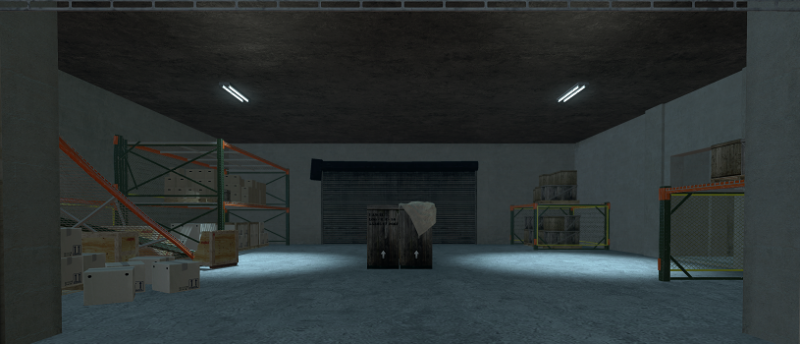
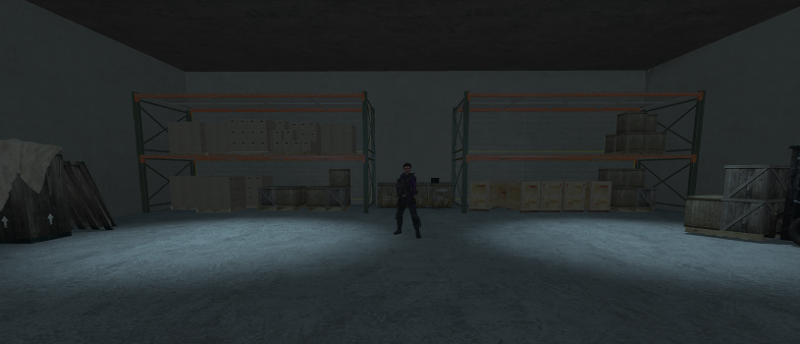
Objective: Explore the warehouse
Enter the now-accessible room.
Tier 1
Task Description
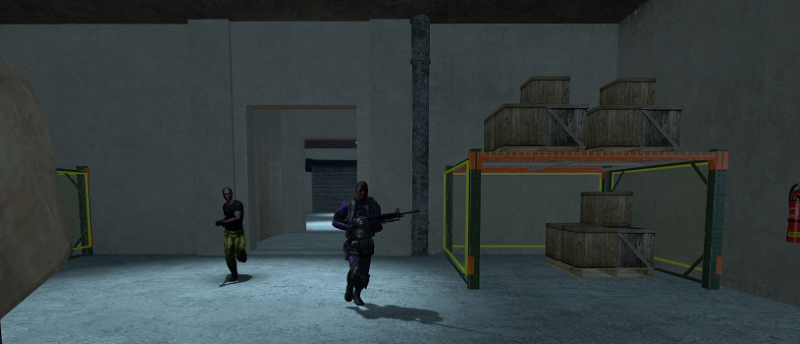
Phoenicians! It was only a matter of time before they showed up! Find out why they are here, and what they are up to.
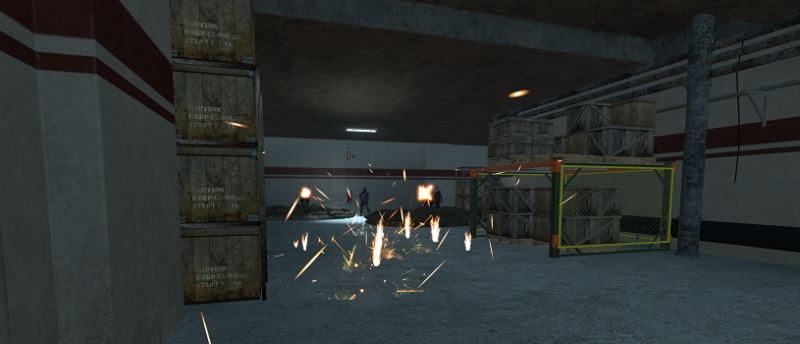
Objective: Defeat the ambush
Immediately upon entering the room, two Phoenician Ground Agents attack from the other open doorway. Defeat them.
Objective: Proceed further into the warehouse
Proceed into the next room now that the Phoenicians aren't there to stop you.
In the next room is yet another keypad awaiting interaction.
Objective: Open the gate
Enter the next keycode necessary to open the gate.
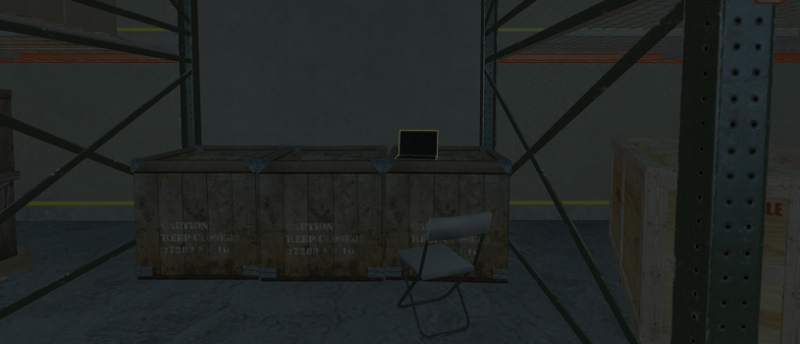
A tablet sits abandoned on a crate.
Hack into the tablet and explore the various apps on it.
As with before, the File Browser has a file waiting to be read.
Select 2) -- File Browser -- > 2) -- Cipher proposal v3 draft.txt -- to see a proposal draft left in the browser.
NOTE TO SELF: Cipher this before putting it on the message board.
I would like to propose a change to C2: rotation. It's simple, after each character just take the rightmost letter of the bottom half of the key, put it on the left side and shift the bottom right by 1. We can denote it C2R.
The Cipher proposal v3 draft.txt references the message board. On the Slightly Damaged Mobile Phone, the board was inaccessible. The tablet, however, is perfectly intact.
Search the Strike-Team Message Board, which can be found at 3) -- Strike-Team Message Board -- in the root.
The final proposal for Cipher C2R can be found within the message board though 3) -- Strike-Team Message Board -- > 2) -- Proposal: Cipher C2R --.
Ground3: C2. K fsori rkjq ms wbswsnq h uchaxq ms U4: bsmhmksa. Km'n nktwrq, hzmqb qhuc uchbhumqb eonm mhjq mcq bkxcmtsnm rqmmqb sz mcq ysmmst chrz sz mcq jql, wom km sa mcq rqzm nkiq hai nckzm mcq ysmmst bkxcm yl 3. Fq uha iqasmq km U4B.
Lead: C2. Lqn. Qahum mckn hm sauq, thaihmsbl ustwrkhauq. Yom nckzm rqzm kanmqhi sz bkxcm, km'n qhnkqb ms uhruorhmq.
Proposal: Cipher C2R is in the C2 cipher.
There is another message in the final proposal that wasn't present in the draft.
There is something else in the Strike-Team Message Board of note: the Gate#2 keycode.
Select 3) -- Strike-Team Message Board -- > 1) -- Gate #2 keycode --.
Soldier3: C2R. K ieibrjj 3vs a2vn 55 hdg T0d 5lk6. 1r yt FGD782
Tech2: For fuck's sake.. I guess I'm just locked in here now. Heard gunshots, went to help and found out the gate code was changed. GREAT SYSTEM WE HAVE GOING ON HERE. If we live, I'm reporting everyone to the Admiralty.
Decrypt Proposal: Cipher C2R as found in the Strike-Team Message Board its entirety using the full C2 cipher to see what changes exist between the Cipher proposal v3 draft.txt that was found in the File Browser and final proposal.
The encrypted message is:
Ground3: C2. K fsori rkjq ms wbswsnq h uchaxq ms U4: bsmhmksa. Km'n nktwrq, hzmqb qhuc uchbhumqb eonm mhjq mcq bkxcmtsnm rqmmqb sz mcq ysmmst chrz sz mcq jql, wom km sa mcq rqzm nkiq hai nckzm mcq ysmmst bkxcm yl 3. Fq uha iqasmq km U4B.
Lead: C2. Lqn. Qahum mckn hm sauq, thaihmsbl ustwrkhauq. Yom nckzm rqzm kanmqhi sz bkxcm, km'n qhnkqb ms uhruorhmq.
Whereas the decrypted message is:
Ground3: C2. I would like to propose a change to C2: rotation. It's simple, after each character just take the rightmost letter of the bottom half of the key, put it on the left side and shift the bottom right by 1. We can denote it C2R.
Lead: C2. Yes. Enact this at once, mandatory compliance. But shift left instead of right, it's easier to calculate.
With the instructions on the C2R Cipher, look to the message within Gate #2 keycode and decrypt it as well.
The encrypted portion of the message is as follows:
Soldier3: C2R. K ieibrjj 3vs a2vn 55 hdg T0d 5lk6. 1r yt FGD782
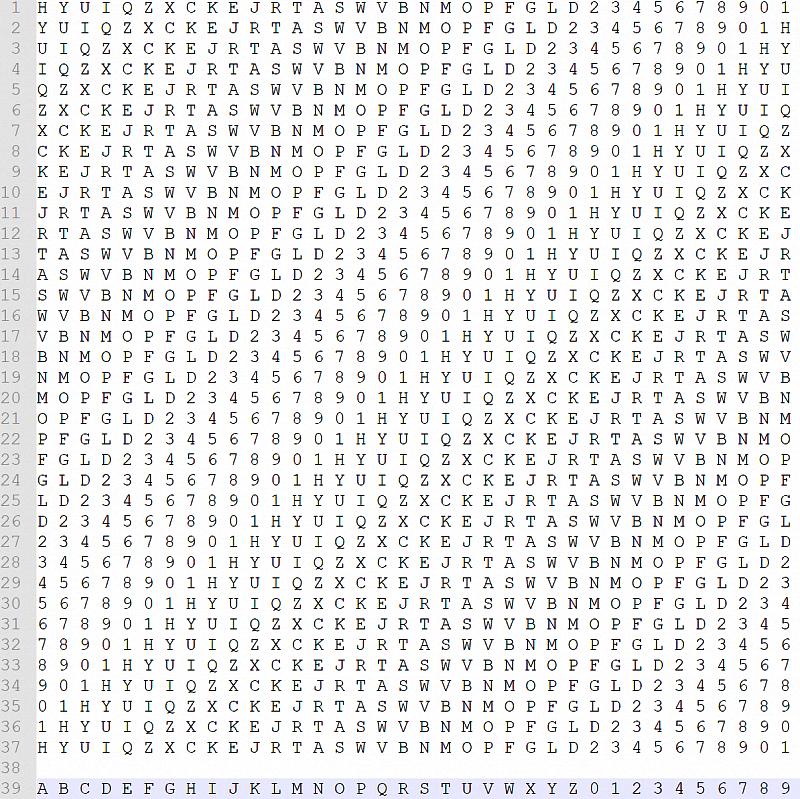
To decrypt a message encrypted with the C2R cipher, begin with the C2 key for the first character in the encrypted message. In this case, Soldier3's first letter "K" would become "I" using HYUIQZXCKEJRTASWVBNMOPFGLD2345678901 as the bottom half of the key as per usual for C2.
The next character that can be decrypted is the "i" in the next word, but instead of using the original C2 key, shift the entire bottom key to the left while keeping it in line with the top key.
Done correctly, the original key should go from this:
ABCDEFGHIJKLMNOPQRSTUVWXYZ0123456789
HYUIQZXCKEJRTASWVBNMOPFGLD2345678901
To this:
ABCDEFGHIJKLMNOPQRSTUVWXYZ0123456789
YUIQZXCKEJRTASWVBNMOPFGLD2345678901H
With this new key for the second character in the encrypted message, the "i" would then become "c".
Continue this pattern for the rest of the message, shifting left to get the key needed for every character within the message.
See the hint below for the full rotation of keys, including the character in the message they are used for, should you desire a visual. The unencrypted portion of the key is listed at line 39.
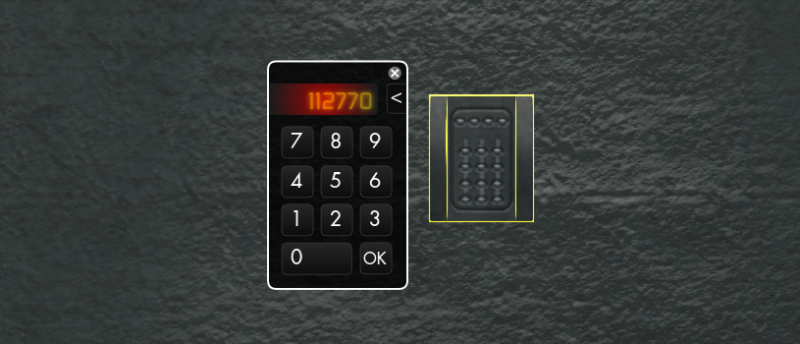
Successfully decrypted, the message reads:
Soldier3: C2R. I changed the code on the 2nd gate. It is 112770.
The code is 112770. Input it into the keypad to open the gate.
Objective: Proceed further into the warehouse
With the gate now open, it is time to venture farther inside.
Objective: Overcome the entrenched Phoenicians
Proceeding further activates a pair of Area Denial Turrets, which are guarded by two Phoenician Ground Agents.
Get across to the turrets and agents either by avoiding the turret fire through patience and timed movement or simply surviving and running through their attacks.
Destroy it all.
Tier 1
Task Description
Phoenicians! It was only a matter of time before they showed up! Find out why they are here, and what they are up to.
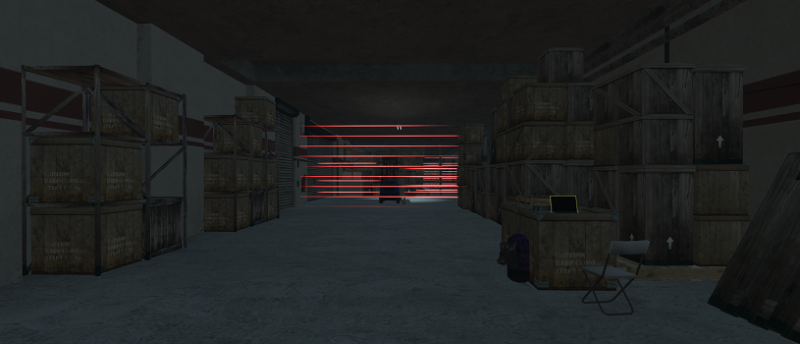
Objective: Pass or deactivate the laser grid
Either pass through the laser grid or deactivate it and proceed to the final room at the end of the hall.
I am Green, You are Red
The achievement I am Green, You are Red can only be completed with an active Manticore Laser Grid. If the Grid has been deactivated, this achievement cannot be earned during that run. The grid can be deactivated afterwards, if so desired.
To earn this achievement, reach the very end of the laser grid and make it across to the other side. While you can pass through the final set of lasers in the grid by teleportation, dying to reach the other side will still reward I am Green, You are Red.
Pass the laser grid
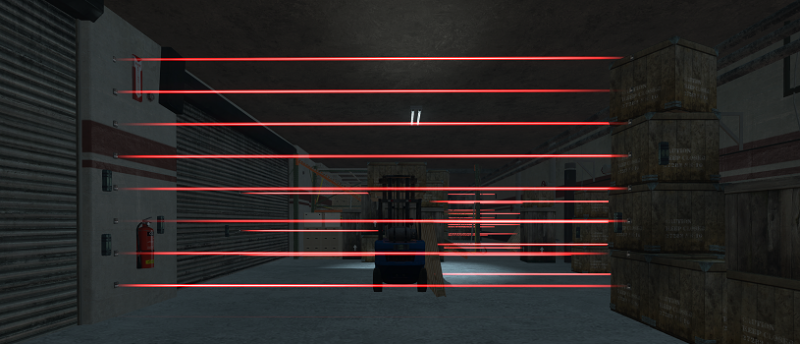
Navigate the laser grid to successfully reach the final room at the end of the hall.
- Laser 1: Jump onto the nearby boxes and walk off their edge to pass the first lasers safely. Moving at any higher speed will surely result in death.
- Laser 2: Walk around the forklift to easily pass by the second lasers.
- Laser 3: Jump over the forklift to its other side and the hop over the single laser. Do not do so while walking.
- Laser 4: Hop over the next single laser in the way. Again, be sure to be running and not walking or you may wind up jumping directly on to the laser.
- Laser 5: Head up the ramp and jump over the laser on it. It is in your way.
- Laser 6: Squeeze through an opening between the boxes just after the ramp laser in order to pass.
- Laser 7: Teleport through the final set of lasers using either Flicker or a teleportation gadget.
Deactivate the laser grid
Deactivate the laser grid to safely reach the final room at the end of the hall.
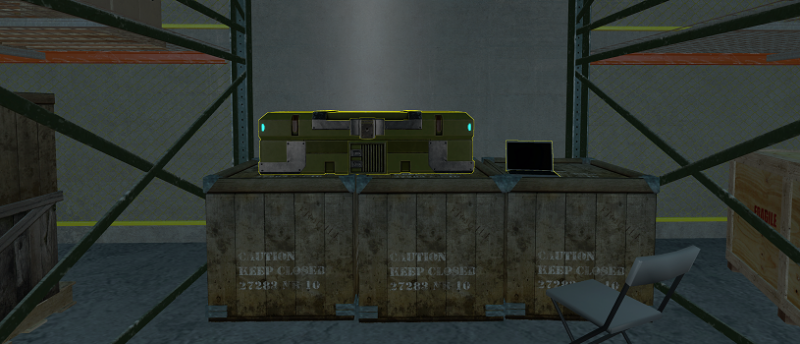
There is a laptop sitting on a crate near the laser grid itself.
In the root, there is the option 4) -- Laser Grid Control --. It requires a password.
Search the PC for information that could help.
Somebody left a Direct Message behind on the Message Board through 3) -- Strike-Team Message Board -- > 1) -- Direct Message: Tech2 --.
Tech2: Urgh I'm so sick of this team. The last week feels like it's been a year. I'm requesting a transfer. Think the chief will give it to me?
Tech1: Yes.
Tech2: You don't like me either, do you?
Tech1: I'm just focused on the mission. Distractions get men killed. And I have a girl waiting back home.
Tech2: Amen.
Tech2: Did you change the password on the laser grid?
Tech1: Yeah. Don't worry, it's safe. It's my girl's birthday.
Tech2: DUDE! NO! Don't say stuff like that!
Tech1: Shit, you're right. Where's the delete button?
While no information on the laptop gives a date, there's still a tablet in the previous room.
Within the tablet's File Browser is the file: dates to remember.txt accessible through 2) -- File Browser -- > 1) -- dates to remember.txt --.
06/12/74 - Dad's birthday
04/06/70 - Mom's birthday
11/20/12 - Wedding
12/27/92 - Denise's birthday - REQUEST TIME OFF OR SHE MIGHT LEAVE ME
Denise's birthday is the only birthday out of those listed within dates to remember.txt that could be for somebody in a romantic relationship with Tech1. The password to deactivate the laser grid is thus 122792.
Select 4) -- Laser Grid Control -- > Input 122792 > 1) -- Deactivate -- to deactivate the laser grid.
NOTE: If you are using the German or French clients, the password is instead 271292.
Objective: Confront the operation leader
Waiting within the room is the Operation Seafoam Leader. Engage them in combat and defeat them.
Objective: Investigate the operation leader's laptop
With the Operation Seafoam Leader out of the way, their laptop is free to be hacked.
Search the laptop for any incriminating information.
Go to 1) -- E-mail -- > 1) -- Inbox -- > 1) -- Orders -- to see what orders were given to the Phoenicians involved in Operation Seafoam.
Subject: Orders
From: fleet8@fleet8.purpleflags.swCommence Operation Seafoam as soon as possible. Ensure maximum distraction. It is imperative that mobilization not be detected by RGB or Venice.
Attached are briefs on objectives. After utilization or completion of all objectives, report to site alpha and maintain a closed site until further notice.
After Mission Completion
In any difficulty Elite 1 and above, a Reward Chest will appear next to the laptop upon mission completion once the operation leader's laptop is investigated. Looting the Reward Chest is not necessary. The Reward Chest contains 3 Glyph Distillates, 1 Talisman or Weapon Distillate, a Glyph Reward Bag, and some Anima Shards. Levels of distillates and anima shard amounts vary based on the Elite difficulty chosen.
Tier 1 Fail
Task Description
<write the task description here>
Fail Objective: Return to the warehouse basement
Travel to the warehouse basement (292,416) by using the door. Returning to the warehouse will return this mission to the first instance of "Explore the warehouse".
This goal appears after leaving the warehouse at any point during Fog and Mirrors and is solved upon returning to the warehouse.